

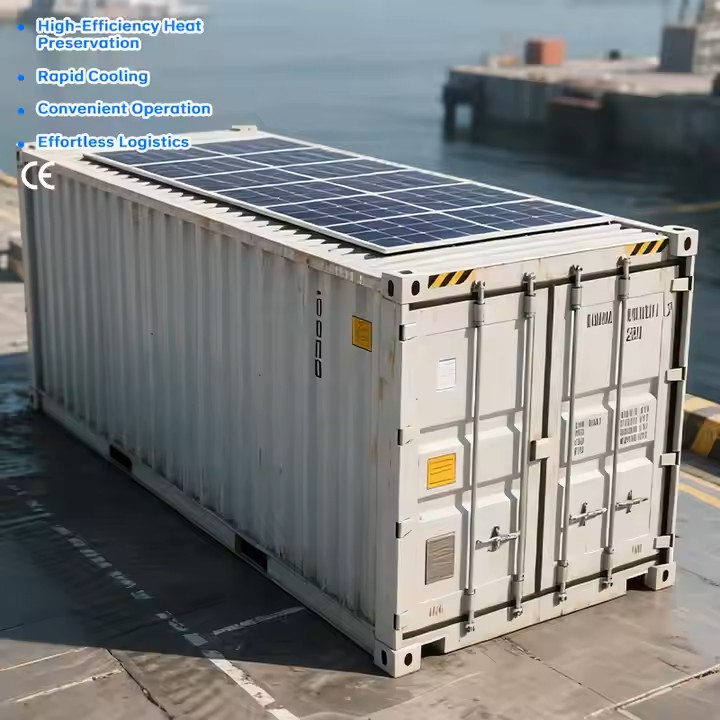
Solar containers integrate solar power generation systems with standard shipping containers, featuring compact structure, easy mobility, and wide applicability. They are widely used in off-grid areas, temporary power supply scenarios, emergency rescue, and remote construction sites. To ensure the long-term stable operation, safe use, and maximum power generation efficiency of solar containers, scientific installation and regular professional maintenance are essential. This guide details the installation steps, key points, daily maintenance, periodic inspection, common fault handling, and safety precautions of solar containers, supplemented by tables for clear reference, providing comprehensive technical support for operators and maintenance personnel.
1. Solar Container Installation
1.1 Site Selection
- Lighting Conditions: Choose an open, unobstructed area with long daily sunlight hours. Ensure that there are no tall buildings, trees, utility poles, or other obstacles around the site that may block sunlight. The optimal sunlight time is not less than 6 hours per day (calculated based on effective sunlight). Avoid areas with frequent fog, haze, or heavy dust, as these will reduce light transmittance and affect the power generation effect of solar modules.
- Ground Conditions: The ground must be flat, stable, and have sufficient load-bearing capacity. The bearing capacity of the ground should not be less than 15kPa (specific values can be adjusted according to the weight of the solar container and the local geological conditions) to prevent the container from tilting, sinking, or deforming due to uneven ground or insufficient bearing capacity. At the same time, the site should have good drainage performance to avoid water accumulation around the container after rain or snow, which may corrode the container body and damage the electrical equipment inside.
- Safety Distance: Keep a safe distance from flammable, explosive, and corrosive materials (such as gasoline, diesel, chemical reagents, etc.), with a minimum distance of not less than 10 meters. Keep a distance of not less than 5 meters from high-voltage lines, transformers, and other high-voltage facilities to avoid electrical interference and potential electric shock hazards. In addition, the site should be far away from flood-prone areas, landslide-prone areas, and other dangerous areas to ensure the safety of the container and equipment.
- Transportation and Operation Space: Reserve sufficient space around the container for transportation, installation, and later maintenance. The width of the access road should not be less than 4 meters to facilitate the entry and exit of transport vehicles and construction machinery (such as cranes, forklifts). Reserve a space of not less than 1.5 meters on all sides of the container for operators to carry out wiring, inspection, and maintenance work.
- Environmental Conditions: Avoid areas with strong wind, strong sand, or extreme temperatures (such as areas with frequent typhoons, sandstorms, or long-term high temperatures above 40℃ or low temperatures below -20℃). If installation in such areas is unavoidable, corresponding protective measures (such as windproof reinforcement, dustproof covers, heat insulation, and cold protection) should be taken to ensure the normal operation of the equipment.
1.2 Foundation Construction
- Concrete Foundation: It is suitable for long-term fixed installation scenarios, with high stability and load-bearing capacity. The concrete grade should not be lower than C25, and the thickness of the foundation should be not less than 10cm. The foundation should be poured horizontally, and the surface flatness error should not exceed ±3mm/m. After pouring, maintain it for more than 7 days to ensure that the concrete strength meets the requirements. Embed expansion bolts or anchor plates in the foundation according to the installation position of the container, which is used to fix the container and prevent it from moving.
- Steel Support Foundation: It is suitable for temporary installation or areas with inconvenient concrete pouring, featuring quick installation and reusability. The steel support is made of channel steel, I-steel, or square steel, and the size and thickness of the steel should be determined according to the weight of the container. The steel support should be treated with anti-corrosion (galvanizing or painting) to avoid rusting. The bottom of the steel support should be equipped with a base plate to increase the contact area with the ground and improve stability. The steel support should be fixed with the ground by expansion bolts or ground piles to prevent tilting.
- Gravel Foundation: It is suitable for areas with good geological conditions and low load-bearing requirements, with simple construction and low cost. First, level the ground, then lay a 15-20cm thick gravel layer, and compact it firmly to ensure that the ground is stable and has no obvious settlement. The gravel should be clean, free of impurities, and the particle size should be between 5-20mm. After compaction, the surface flatness error should not exceed ±5mm/m. Gravel foundation is only suitable for short-term use, and long-term use may lead to ground settlement, so it is not recommended for areas with heavy rainfall or soft soil.
1.3 Container Placement and Leveling
- Container Hoisting: Use a crane with sufficient lifting capacity (the lifting capacity should be not less than 1.2 times the weight of the container) to hoist the container. Before hoisting, check the hoisting equipment, slings, and hooks to ensure they are in good condition and free of damage. During hoisting, the slings should be symmetrically hung on both sides of the container to ensure that the container is balanced and does not tilt. The hoisting speed should be slow and stable, and avoid collision with other objects during hoisting. After the container is hoisted to the foundation, adjust the position to align it with the pre-embedded anchor plates or steel supports.
- Leveling Adjustment: Use a level (precision not less than 0.02mm/m) to check the levelness of the container. The levelness error of the container's top surface and bottom surface should not exceed ±2mm/m. If the container is tilted, adjust it by adding shims between the container and the foundation (the shims should be made of steel or hardwood, with sufficient strength and not easy to deform). Adjust the shims evenly to ensure that the container is evenly stressed and there is no local stress concentration. After leveling, fix the container with the foundation using bolts or welding to prevent the container from moving or tilting due to wind or other external forces.
- Sealing Treatment: After the container is fixed, carry out sealing treatment on the connection between the container and the foundation to prevent rainwater, moisture, and pests from entering the container. Use waterproof sealant or rubber gasket to seal the gap between the container and the foundation. For areas with heavy rainfall, a drainage ditch can be set around the foundation to guide rainwater to discharge in time, avoiding water accumulation at the bottom of the container.
1.4 Solar Module Installation
- Bracket Installation: First, install the solar module bracket on the roof of the container or the ground support. The bracket should be made of high-strength aluminum alloy or galvanized steel, which has good corrosion resistance and load-bearing capacity. The bracket installation should be firm, and the connection between the bracket and the container roof/ground support should be fixed with bolts to prevent loosening. The spacing between the brackets should be determined according to the size of the solar modules and the design requirements, ensuring that the modules can be firmly fixed on the brackets.
- Module Fixing: Place the solar modules on the brackets in sequence, aligning the mounting holes of the modules with the holes on the brackets. Use stainless steel bolts or clips to fix the modules on the brackets, ensuring that the modules are flat and tight, without looseness or shaking. The torque of the bolts should be controlled within the range specified by the manufacturer (usually 8-12N·m) to avoid damaging the modules due to excessive torque or insufficient fixing due to too small torque. When installing the modules, pay attention to the positive and negative polarity of the modules to ensure correct connection later. In addition, a gap of 2-3cm should be reserved between adjacent modules to facilitate heat dissipation and avoid mutual shielding.
- Angle Adjustment: The installation angle of solar modules has a significant impact on power generation efficiency. The optimal installation angle is usually equal to the local latitude, or adjusted according to the local sunlight conditions (for areas in the northern hemisphere, the angle can be increased by 5-10° on the basis of the latitude to improve the power generation efficiency in winter; for areas in the southern hemisphere, the angle can be decreased by 5-10°). The common installation angle range is 30°-45°, which can maximize the absorption of sunlight. After adjusting the angle, fix the bracket to prevent the angle from changing due to wind or other external forces.
1.5 Electrical System Connection
- Cable Preparation: Select connecting cables that meet the specifications. The cross-sectional area of the cables should be determined according to the current intensity and transmission distance to reduce power loss (the larger the cross-sectional area of the cables, the smaller the resistance, and the smaller the power loss). The cables should be UV-resistant, waterproof, and corrosion-resistant to adapt to outdoor environments. Before connection, strip the insulation layer of the cable ends, and ensure that the stripped length is appropriate (usually 5-8mm) to avoid poor contact or short circuits.
- Module String Connection: Connect the solar modules in series or parallel according to the design requirements to form a module string. When connecting in series, the positive pole of one module is connected to the negative pole of the next module, and the total voltage of the string is the sum of the voltages of each module; when connecting in parallel, the positive poles of all modules are connected together, and the negative poles are connected together, and the total current of the string is the sum of the currents of each module. The connection between the modules should use special connectors (such as MC4 connectors), which should be inserted firmly and wrapped with insulating tape to prevent water ingress and poor contact. After connection, check the voltage and polarity of the module string to ensure they meet the design requirements.
- Connection of Module String to Charge Controller: Connect the positive and negative poles of the module string to the corresponding terminals of the charge controller (the positive pole of the module string is connected to the positive terminal of the controller, and the negative pole is connected to the negative terminal of the controller). Strictly distinguish the positive and negative polarity to avoid reverse connection, which may damage the charge controller. Install an anti-reverse diode between the module string and the charge controller to prevent the current from flowing back from the battery to the module at night, which may damage the module.
- Connection of Charge Controller to Battery Pack: Connect the positive and negative poles of the battery pack to the corresponding terminals of the charge controller (the positive pole of the battery pack is connected to the positive terminal of the controller, and the negative pole is connected to the negative terminal of the controller). The battery pack should be installed in a well-ventilated, dry, and clean battery compartment inside the container. The connection between the batteries should use copper bars or thick cables, and the terminals should be tightened to prevent loosening and overheating due to poor contact. After connection, check the battery voltage to ensure it is consistent with the rated voltage of the controller.
- Connection of Charge Controller to Inverter: Connect the positive and negative poles of the inverter to the corresponding terminals of the charge controller (the positive pole of the inverter is connected to the positive terminal of the controller, and the negative pole is connected to the negative terminal of the controller). The inverter is used to convert the direct current generated by the solar modules and stored in the battery pack into alternating current for use by electrical equipment. The connection between the inverter and the controller should use cables with sufficient cross-sectional area to avoid power loss and overheating. Install a circuit breaker between the inverter and the controller to facilitate power cutoff during maintenance.
- Grounding Connection: Ground the entire electrical system to prevent lightning and static hazards. The grounding resistance should not exceed 4Ω. The grounding electrode can be made of steel pipes or angle steel, buried in the ground to a depth of not less than 1.5 meters. Connect the grounding electrode to the grounding terminals of the charge controller, inverter, distribution box, solar modules, and container body using grounding cables. Ensure that the grounding connection is firm and reliable, and there is no rust or poor contact.
- Distribution Box Connection: Connect the inverter to the distribution box, and connect the electrical equipment that needs power supply to the distribution box. The distribution box should be equipped with circuit breakers, fuses, and other protective devices to protect the electrical equipment from overcurrent, overvoltage, and short circuits. The wiring in the distribution box should be neat and standardized, with clear labels to facilitate inspection and maintenance.
1.6 System Commissioning
- Inspection Before Commissioning: Check the installation of all components (container, solar modules, brackets, electrical equipment, etc.) to ensure they are firm and free of looseness. Check the wiring of the electrical system to ensure correct connection, no wrong connection, reverse connection, or loose connection. Check the grounding system to ensure it is reliable. Check the battery pack to ensure the electrolyte level (for lead-acid batteries) is normal and the terminals are clean.
- Power-On Commissioning: First, turn on the power switch of the charge controller, then turn on the power switch of the inverter, and finally turn on the power switch of the distribution box. Observe the operation status of each equipment: the indicator lights of the charge controller should be normal (such as the power indicator light is on, the charging indicator light is on), the inverter should operate stably without abnormal noise, and the display screen of the distribution box should show normal voltage and current values.
- Power Generation Test: Test the power generation efficiency of the system under sunlight. Record the voltage, current, and power output of the solar module string, charge controller, and inverter, and compare them with the design values to check whether the power generation efficiency meets the requirements. If the power generation efficiency is lower than the design value, check whether the solar modules are shaded, the installation angle is correct, the wiring is loose, or the equipment is faulty.
- Fault Handling: During commissioning, if any abnormal situation is found (such as equipment failure, abnormal noise, short circuit, etc.), immediately cut off the power supply, check the cause, and handle it in time. After the fault is eliminated, re-commission until the system operates normally.
- Commissioning Record: Record the commissioning results, including the installation parameters, equipment operation status, power generation data, fault handling process, etc., to provide a basis for later maintenance and inspection.
1.7 Installation Process Summary Table
|
Installation Stage
|
Key Operation Steps
|
Key Requirements
|
Inspection Standards
|
|---|---|---|---|
|
Site Selection
|
1. Investigate lighting conditions; 2. Check ground bearing capacity and drainage; 3. Determine safety distance; 4. Reserve operation space; 5. Evaluate environmental conditions.
|
Effective sunlight ≥6 hours/day; ground bearing capacity ≥15kPa; safe distance from flammables ≥10m, from high-voltage facilities ≥5m; operation space ≥1.5m around; avoid extreme environments.
|
No obstacles blocking sunlight; ground flat without settlement; safety distance meets requirements; operation space sufficient; no potential environmental hazards.
|
|
Foundation Construction
|
1. Choose foundation type (concrete/steel/gravel); 2. Pour/compact foundation; 3. Embed anchor plates/supports; 4. Anti-corrosion and waterproof treatment; 5. Maintenance (for concrete foundation).
|
Concrete grade ≥C25, thickness ≥10cm; steel support galvanized/painted; gravel layer thickness 15-20cm; surface flatness error ≤±3mm/m (concrete), ≤±5mm/m (gravel); maintenance ≥7 days.
|
Foundation stable without cracks; anchor plates/supports firm; anti-corrosion and waterproof qualified; flatness meets requirements; concrete strength up to standard.
|
|
Container Placement & Leveling
|
1. Hoist container to foundation; 2. Adjust position; 3. Level container with level; 4. Fix container to foundation; 5. Seal gap between container and foundation.
|
Hoisting capacity ≥1.2 times container weight; levelness error ≤±2mm/m; fixing bolts tight; sealant/gasket intact; no water accumulation at bottom.
|
Container balanced without tilting; levelness meets requirements; fixed firmly; no gap between container and foundation; drainage smooth.
|
|
Solar Module Installation
|
1. Install module brackets; 2. Fix solar modules on brackets; 3. Adjust installation angle; 4. Check module connection; 5. Reserve heat dissipation gap.
|
Brackets made of high-strength corrosion-resistant materials; module fixing torque 8-12N·m; installation angle 30°-45°; connectors inserted firmly; gap between modules 2-3cm.
|
Brackets firm without looseness; modules flat and tight; angle correct; connectors waterproof; no mutual shielding between modules.
|
|
Electrical System Connection
|
1. Prepare connecting cables; 2. Connect module strings; 3. Connect module strings to charge controller; 4. Connect charge controller to battery pack and inverter; 5. Ground system; 6. Connect inverter to distribution box.
|
Cables UV-resistant and waterproof; cross-sectional area meets requirements; correct polarity; anti-reverse diode installed; grounding resistance ≤4Ω; wiring neat with labels.
|
No wrong/reverse connection; cables firm without damage; grounding reliable; no short circuit; terminals tight without overheating.
|
|
System Commissioning
|
1. Pre-commissioning inspection; 2. Power-on step by step; 3. Test equipment operation status; 4. Detect power generation efficiency; 5. Handle faults; 6. Record commissioning results.
|
All components installed correctly; equipment indicator lights normal; inverter operates stably; power generation efficiency close to design value; fault handling timely.
|
System operates normally without abnormal noise; power generation data up to standard; no faults after commissioning; commissioning record complete.
|
2. Solar Container Maintenance
2.1 Daily Maintenance (Daily Inspection)
- Visual Inspection of Solar Modules: Check the surface of solar modules for dust, leaves, bird droppings, snow, and other debris that may affect light absorption. Check whether the modules are cracked, scratched, or damaged, and whether the connectors are loose or fall off. If there is debris, clean it in time; if there is damage, mark it and report it for handling.
- Inspection of Electrical Equipment Operation Status: Observe the indicator lights and display screens of the charge controller, inverter, and distribution box to ensure they are operating normally. Check whether there is abnormal noise, overheating, or peculiar smell in the inverter and charge controller. If any abnormality is found, immediately cut off the power supply and report it.
- Inspection of Battery Pack: Check the battery compartment for moisture, dust, or peculiar smell. Observe the appearance of the battery pack for bulging, leakage, or corrosion. For lead-acid batteries, check the electrolyte level (it should be between the upper and lower scale lines of the battery). If the electrolyte level is too low, add distilled water in time (do not add tap water or electrolyte).
- Inspection of Container Body: Check the doors, windows, and seals of the container for damage, deformation, or water leakage. Check whether the container body has rust, paint peeling, or other phenomena. Check the interior ventilation and heat dissipation system (such as fans) to ensure it is operating normally.
- Cleaning of Surrounding Environment: Clean the debris around the container, ensure the drainage ditch is smooth, and avoid blocking the drainage system. Keep the area around the solar modules unobstructed to prevent shading.
- Record Maintenance Results: Record the daily inspection results, including the operation status of equipment, abnormalities found, and handling measures, to form a daily maintenance record.
2.2 Periodic Maintenance
2.2.1 Weekly Maintenance
- Comprehensive Cleaning of Solar Modules: Use clean water or a soft cloth to clean the surface of the solar modules, removing dust, bird droppings, and other debris. Avoid using hard brushes, sandpaper, or chemical cleaning agents (such as detergent, acid, alkali), which may scratch the surface of the modules or damage the anti-reflective coating.
- Inspection of Electrical Connections: Check all electrical connections (cables, connectors, terminals) for looseness, aging, or corrosion. Tighten loose terminals, replace aging or corroded cables and connectors, and re-wrap the connection parts with insulating tape to ensure good insulation.
- Testing of Electrical Parameters: Use a multimeter to test the voltage, current, and power output of the solar module string, charge controller, battery pack, and inverter, and compare them with the standard values. If there is a large deviation, check the cause and handle it.
- Inspection of Container Sealing: Check the seals of the container doors, windows, and ventilation ports for aging, deformation, or damage. Replace damaged seals in time to prevent water ingress and moisture.
2.2.2 Monthly Maintenance
- Inspection of Solar Module Brackets: Check whether the brackets are loose, deformed, or rusted. Tighten loose bolts, replace deformed or rusted brackets, and re-spray anti-corrosion paint on the brackets if necessary.
- Maintenance of Battery Pack: Clean the surface of the battery pack and terminals to remove dust and corrosion. Tighten the battery terminals to prevent loose connection and overheating. For lead-acid batteries, check the specific gravity of the electrolyte (it should be 1.24-1.28 at 25℃) and adjust it if necessary. Check the charging and discharging status of the battery pack to avoid overcharging or deep discharging.
- Cleaning of Electrical Equipment: Clean the dust inside the charge controller, inverter, and distribution box with a hair dryer or vacuum cleaner to ensure normal heat dissipation. Check the heat dissipation fans of the inverter and controller to ensure they are operating normally; if there is noise or failure, replace the fans in time.
- Inspection of Grounding System: Check the grounding connection for looseness, rust, or damage. Tighten loose grounding bolts, replace rusted or damaged grounding cables, and test the grounding resistance (it should not exceed 4Ω); if the grounding resistance is too large, add grounding electrodes or improve the grounding system.
2.2.3 Quarterly Maintenance
- Inspection of Solar Module Performance: Use a solar module tester to test the open-circuit voltage and short-circuit current of each solar module, and check whether there are modules with reduced performance (such as broken grids, hot spots). Replace damaged or low-performance modules in time to ensure the overall power generation efficiency of the system.
- Inspection of Inverter Performance: Test the conversion efficiency of the inverter, check whether there is harmonic pollution, and ensure the inverter operates stably. Check the cooling system of the inverter, clean the cooling fins, and replace the cooling oil (for oil-cooled inverters) if necessary.
- Inspection of Container Structure: Check the container body for deformation, rust, or paint peeling. Repair rust spots by derusting, painting, or galvanizing. Check the strength of the container's supporting structure to ensure it is stable and reliable.
- Calibration of Monitoring Equipment: If the solar container is equipped with a power generation monitoring system, calibrate the monitoring equipment to ensure the accuracy of the monitored data (such as voltage, current, power, power generation). Check the communication status of the monitoring system to ensure it can transmit data normally.
2.2.4 Annual Maintenance
- Overall Inspection of the System: Conduct a comprehensive inspection of the entire solar container system, including all components and connections, to eliminate potential faults and hidden dangers.
- Replacement of易损 Parts: Replace易损 parts that have reached the service life (such as seals, fuses, cooling fans, battery terminals, etc.) to ensure the normal operation of the system. The service life of general seals is 1-2 years, fuses are 2-3 years, and cooling fans are 2-3 years.
- Performance Test of the Entire System: Conduct a full-load operation test of the system, test the power generation efficiency, stability, and reliability of the system under different sunlight conditions, and compare it with the initial commissioning data to evaluate the overall performance of the system. If the performance is significantly reduced, analyze the cause and take improvement measures.
- Maintenance of Foundation: Check the foundation for settlement, cracks, or damage. If there is settlement, adjust the container level in time; if there are cracks, repair them with concrete repair materials; if the damage is serious, rebuild the foundation.
- Sorting of Maintenance Records: Sort out all daily, weekly, monthly, and quarterly maintenance records, summarize the operation status of the system, fault handling experience, and maintenance suggestions, and form an annual maintenance report for reference in later maintenance and system optimization.
2.3 Special Maintenance
2.3.1 Maintenance After Extreme Weather
- After Typhoon/Sandstorm: Check whether the solar modules, brackets, and container body are deformed, damaged, or blown down. Check whether the electrical connections are loose or disconnected. Clean the dust and debris on the surface of the modules and inside the container. Tighten loose bolts, replace damaged components, and reinforce the brackets if necessary.
- After Heavy Rain/Snowstorm: Check whether the container has water leakage, and whether the foundation and drainage system are damaged. Clean the accumulated water and snow around the container and on the surface of the modules. Check the battery pack for moisture or short circuit. Dry the interior of the container and electrical equipment in time to avoid corrosion and damage.
- After Thunderstorm: Check the grounding system for damage, and test the grounding resistance. Check whether the charge controller, inverter, and other electrical equipment are damaged by lightning. Check the solar modules and cables for lightning strike marks. Replace damaged equipment and components in time, and strengthen the lightning protection system if necessary.
Post time:Sep-25-2020
